
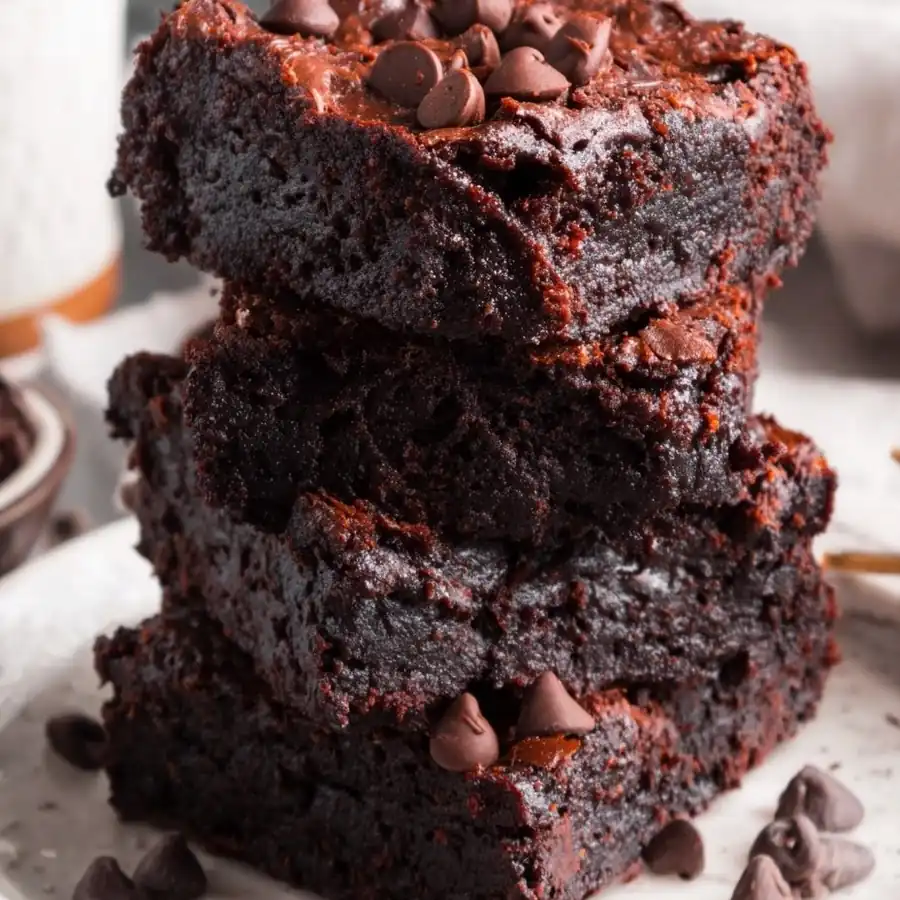
If you’re anything like me, you treasure desserts that combine comfort with a little unexpected twist. These Banana Brownies with Peanut Butter and Cocoa Recipe offer exactly that—a velvety chocolate treat with the natural sweetness of ripe bananas and the rich, creamy depth of peanut butter. I love how this recipe marries the fudgy texture of brownies with wholesome ingredients you already know and love.
You’ll enjoy how effortlessly this recipe comes together, making it the perfect go-to for those moments when you want something luxurious but fuss-free. Whether you’re baking for your family or simply treating yourself after a long day, these brownies deliver crunch from optional chocolate chips and a mouthwatering cocoa punch that lingers delightfully on your palate.
★ Key Reasons to Try It
- Simple Steps: Highlight how easy it is to create this treat.
- Luxurious Flavor: Emphasize rich, memorable taste.
- Perfect for Gatherings: Show why it shines for celebrations.
- Prep-Friendly: Explain make-ahead and storage perks.
Gather the Goodness |
- 3 large ripe bananas: The riper they are, the sweeter and softer your brownies will become.
- ½ cup natural peanut butter: Choose creamy or chunky depending on your texture preference, or swap for almond, cashew, or sunflower seed butter.
- ¼ cup sifted cocoa powder: I always sift mine to avoid lumps for smoother batter and richer chocolate flavor.
- ¼ cup chocolate chips (optional): Adds a delightful melt-in-your-mouth crunch, but feel free to leave them out or add nuts instead.
Selecting high-quality ingredients here truly makes a difference. I recommend fresh, speckled bananas and natural nut butter without added sugars or oils for that clean, indulgent taste you’ll savor every bite of. Plus, this recipe’s flexibility means you can easily adjust to what you have on hand without compromising flavor.
-
- Preheat and prepare: Set your oven to 350°F and line an 8-inch baking pan with parchment paper. This tip makes removing your brownies a true cinch, preventing any sticky mess and risking breakage.
- Mash bananas: In a large bowl, use a fork to mash your ripe bananas until smooth but still a bit chunky—this helps keep your brownies moist and adds natural sweetness that feels oh-so indulgent.
- Stir in peanut butter: Blend your peanut butter with the mashed bananas thoroughly, creating a creamy and golden base that smells heavenly as you mix.
- Add sifted cocoa powder: Fold in the cocoa gently, ensuring the batter turns a rich, deep brown. Don’t worry if the dough looks thick — the final brownies are supposed to stay fudgy and dense.
✔ Helpful Baking Pointers
Don’t overmix the batter once you add the cocoa—stir just until combined; this keeps brownies indulgently fudgy. Use fresh bananas that are soft but not overly mushy for the best texture. Bake exactly 20 minutes and start checking a couple minutes earlier if your oven runs hot. A toothpick with moist crumbs is perfect doneness; you want gooey, never dry or cake-like.
- Transfer and add mix-ins: Pour the batter into your lined pan, smoothing it evenly. Sprinkle chocolate chips over the top if you chose to use them—this little layer adds bursts of melty richness that everyone will love.
- Bake and cool: Bake the brownies for 20 minutes. Resist the urge to slice immediately; cooling lets the brownies set to that perfect velvety consistency you’ll crave. I usually wait at least 30 minutes, and sometimes refrigerate for a firmer texture.
 Serve Up Sweet Moments |
Once your Banana Brownies with Peanut Butter and Cocoa Recipe are cooled and sliced, you’re ready to savor every bite or share the love. I find they’re an instant hit whether served as an afternoon pick-me-up or a decadent finish to any meal. Remember, the joy of baking is as much about the process as the reward—so gather your loved ones and let those sweet moments unfold.
♡ Serving & Storage Ideas
- Perfect Pairings: Enjoy with a bold coffee or creamy vanilla ice cream to balance the rich cocoa.
- Plating Touch: A light dusting of powdered sugar or a drizzle of melted peanut butter adds elegance with minimal effort.
- Leftover Bliss: Store brownies in an airtight container at room temperature for up to 3 days or freeze slices for up to a month.
- Holiday Flair: Sprinkle festive colored chocolate chips or chopped nuts on top for a seasonal celebration boost.
- Add a teaspoon of cinnamon or espresso powder to deepen the chocolate notes.
- Swirl in a bit of honey or maple syrup for extra natural sweetness.
- Top with crushed pretzels or toasted coconut flakes for contrasting crunch.
- Use almond or cashew butter as the nut butter base to vary flavors.
- For an allergy-friendly option, swap cocoa powder for carob powder and use sunflower seed butter.
- Mix in chopped dried fruit like cherries or raisins for a chewy surprise.
Make-Ahead & Keep Fresh
- After baking and cooling completely, wrap brownies tightly in plastic wrap to keep moisture locked in.
- Use an airtight container to store leftovers in the fridge up to a week—you can bring them back to room temp before serving.
- Freeze in single servings wrapped in parchment and foil to enjoy anytime—a quick 20-second zap in the microwave perks them right back up.
- For best freshness, avoid cutting brownies until ready to serve.
- Can I use frozen bananas? Absolutely! Just thaw and drain any excess liquid before mashing to prevent a watery batter.
- What if I don’t have parchment paper? Lightly grease your baking pan well with butter or cooking spray to avoid sticking.
- Can I substitute the peanut butter for another nut butter? Yes, almond, cashew, or sunflower seed butters all work beautifully and add subtle flavor nuances.
- Are these brownies gluten-free? Yes! This recipe contains no flour, making it naturally gluten-free and grain-free.
- How can I tell when the brownies are done? Look for a slightly firm surface; a toothpick inserted should come out with moist crumbs, not wet batter.
Banana Brownies with Peanut Butter and Cocoa Recipe

These Banana Brownies are a deliciously moist and fudgy treat that combine ripe bananas, natural peanut butter, and rich cocoa powder for a healthier twist on traditional brownies. With an easy prep and bake method, they’re perfect for a quick snack or dessert, and can be customized with chocolate chips for extra indulgence.
- Prep Time: 10 minutes
- Cook Time: 20 minutes
- Total Time: 30 minutes
- Yield: 9 1x
- Category: Dessert
- Method: Baking
- Cuisine: American
Ingredients
- 3 large bananas
- ½ cup natural peanut butter (or any nut butter like almond, cashew, or sunflower seed butter)
- ¼ cup cocoa powder, sifted
- ¼ cup chocolate chips (optional)
Instructions
- Preheat your oven to 350°F (175°C) and line an 8-inch square baking pan with parchment paper to prevent sticking and make it easier to remove the brownies.
- In a large bowl, mash the ripe bananas thoroughly using a fork until smooth and creamy to create a natural sweet base for the brownies.
- Stir in the natural peanut butter until the mixture is smooth. Next, sift in the cocoa powder to avoid lumps and stir until everything is well incorporated to achieve a fudgy batter.
- Pour and spread the batter evenly into the prepared baking pan. Sprinkle the chocolate chips over the top if you’re using them for added chocolatey bursts.
- Place the pan in the preheated oven and bake for 20 minutes or until a toothpick inserted into the center comes out mostly clean with a few moist crumbs, indicating a fudgy texture.
- Allow the brownies to cool completely in the pan before slicing into squares. This helps them set perfectly and makes slicing easier.