
I love how Rainbow Cake Pops feel like a bite-sized celebration—each pop bursts with vibrant colors and a dreamy, moist cake center that melts in your mouth. If you’re looking for a playful yet elegant dessert, this Rainbow Cake Pops Recipe will charm your taste buds and impress at any party.
You’ll enjoy the satisfying contrast of the soft cake, creamy frosting blend, and that crisp, colorful candy coating. Plus, making these pops is such a joyous project—I always find it relaxing to blend those bright gel colors and shape each rainbow ball. Let me guide you step-by-step so you can create this magical treat at home with confidence!
★ Key Reasons to Try It
- Simple Steps: Highlight how easy it is to create this treat.
- Luxurious Flavor: Emphasize rich, memorable taste.
- Perfect for Gatherings: Show why it shines for celebrations.
- Prep-Friendly: Explain make-ahead and storage perks.
Gather the Goodness |
- 16.25-ounce box white cake mix (plus ingredients on back of box)
- 6-8 tablespoons vanilla frosting
- Red, orange, yellow, green, blue, & purple gel food coloring (gel gives vibrant hues without thinning batter)
- ¼ cup white chocolate chips
- 1 cup white melting wafers
- 1 cup multi-colored melting wafers (optional: blue, pink, orange, yellow & green used here)
- 3 tablespoons Crisco shortening (to thin melting wafers perfectly)
Choosing quality ingredients is the first step to baking success. I suggest selecting a reliable white cake mix you trust—something with a tender crumb and subtle vanilla flavor works beautifully here. If you prefer, you can swap the box mix for your favorite homemade white cake recipe, just keep the texture light and moist. Use gel food coloring for bright, lasting colors without impacting batter consistency.
Ready to bake the most joyful dessert ever? Follow these detailed steps, and you’ll love watching those colorful cupcakes transform into stunning, bite-sized pops.
- Preheat & Prep: Preheat your oven according to your cake mix directions and prepare a 12-cup muffin tin with non-stick spray—making cleanup easy and ensuring pops release perfectly.
- Mix the Batter: Combine all cake mix ingredients in a large bowl using an electric mixer until smooth. I find this step crucial for a silky batter that bakes evenly.
- Divide & Color: Separate the batter equally into six bowls, about ⅔ cup each. Add a different gel food coloring to each bowl, mixing gently with a fork until fully blended. You can intensify each color gel, but a little goes a long way.
- Fill the Muffin Tin: Pour each colored batter into two cupcake cups, filling about ¾ full. It’s okay if you have a bit leftover; discard any excess for even-sized pops.
- Bake & Test: Bake according to the package times. Use a toothpick to check doneness—it should come out dry. Cooling completely is key to avoid crumbly cake and messy mixtures later on.
- Trim & Crumble: After cooling, carve off the firmer, browned edges with a bread knife. These bits won’t give the best texture for your pops. Then, crumble each cupcake into separate bowls by color. The crumbles will soon become your moist cake centers.
- Mix with Frosting: Add approximately one tablespoon of vanilla frosting into each bowl of crumbs and mix the texture is dense but moist. This binding step keeps your cake pops tender but firm enough to shape.
✔ Helpful Baking Pointers
When mixing your batter, avoid over-beating to keep your cake light and fluffy. Bake in the center of your oven for even heat distribution. For frosting mix-ins, always add a little at a time—too much will make the batter too soft to shape. Cooling cupcakes fully prevents crumb fall-apart.
- Form the Layers: Pinch small portions of each colored mixture into half teaspoon balls. Gently flatten one ball of each color—purple through to red—in this order. Stack them carefully to start building the rainbow effect.
- Press & Roll: Press the stacked layers together lightly top-to-bottom, then side-to-side in your palm. Slowly roll the pieces into a smooth, compact ball slightly smaller than a golf ball. This creates your iconic rainbow layered pop.
- Chill: Place the rainbow balls on a baking sheet and refrigerate for at least 4 hours or overnight. This chilling firm up the pops, making them easier to dip.
- Melt the Chocolate: Soften your white chocolate chips in the microwave on 50% power for 1 minute, stirring, then in 30-second bursts until silky smooth. This will be your adhesive for cake pop sticks.
- Insert Sticks: Remove the rainbow balls from the fridge. Poke a cake pop stick about two-thirds of the way through each ball, then remove the stick. Dip the tip in melted chocolate and reinsert to secure the stick—this prevents loosening later.
- Refrigerate: Return cake pops to the fridge to chill for 30-60 minutes, ensuring sticks set firmly. This pause is essential before decorating.
- Prepare Coatings: Heat each colored melting wafer separately with ½ tablespoon Crisco at 50% microwave power—you want a flowing, sauce-like consistency. Stir frequently and add more shortening if needed. This thin glaze guarantees a smooth dip.
- Dip & Decorate: Dip each cake pop one at a time into the colored coating. Remove excess the stick, letting it drip off naturally. Place pops upside down on a stand and quickly add sprinkles for a fun textured finish.
- Final Chill: Refrigerate again for 30 minutes to set the colorful candy coating fully. Then, your vibrant Rainbow Cake Pops Recipe masterpiece is ready to dazzle!
 Serve Up Sweet Moments |
Nothing brings more joy than sharing these delightful rainbow bites with friends or family. Whether it’s a birthday, holiday, or a casual get-together, your Rainbow Cake Pops will be the star of the dessert table. I love watching people’s eyes light up at how stunning and tasty these pops are—don’t be surprised if you need to make extra!
♡ Serving & Storage Ideas
- Perfect Pairings: Try these pops alongside a sparkling lemonade or creamy vanilla milkshake for a balanced flavor treat.
- Plating Touch: Arrange them standing in a bright vase or tiered stand, and add edible glitter or fresh berries for extra charm.
- Leftover Bliss: Store leftovers in an airtight container in the fridge for up to 5 days without losing their fresh, crisp coating.
- Holiday Flair: Swap sprinkle colors seasonally—use red and green for Christmas, pastels for Easter, or metallics for New Year’s.
- Experiment with flavor extracts like almond or lemon in your frosting for a subtle twist.
- Decorate pops with edible gold leaf or edible glitter for a luxe look perfect for special occasions.
- Substitute vegan or dairy-free frosting and candy melts to cater to dietary needs.
- Add a surprise candy pieces or sprinkles inside the cake ball before chilling.
- Try ombré color layers instead of rainbow for a modern minimalistic effect.
Make-Ahead & Keep Fresh
- Store chilled cake pops in an airtight container in the fridge for up to 5 days.
- Wrap individual pops in cellophane bags and freeze up to 1 month; thaw in fridge overnight before serving.
- If coating gets soft after thawing, give pops a quick re-chill on a baking sheet before serving.
- Can I use homemade cake instead of box mix? Absolutely! Just ensure your cake is tender and moist, crumb it finely, and mix well with frosting for perfect shaping.
- What if I don’t have all the colors of melting wafers? No problem—you can dip cake pops in white coating and decorate with sprinkles or drizzle with colored melts for effect.
- How do I prevent cracking when dipping? Make sure your melted coating is smooth and runny but not too hot. Chill cake pops well before dipping to create a solid surface.
- Can I prepare cake pops ahead of time? Yes! Chill the shaped balls, insert sticks, and coat the day before serving. Store in the fridge wrapped to keep fresh.
- How do I store leftover cake pops? Keep them in an airtight container in the fridge for 3-5 days; avoid moisture to preserve the crisp coating.

Rainbow Cake Pops Recipe
- Total Time: 2 hours 30 minutes
- Yield: 18 1x
Description
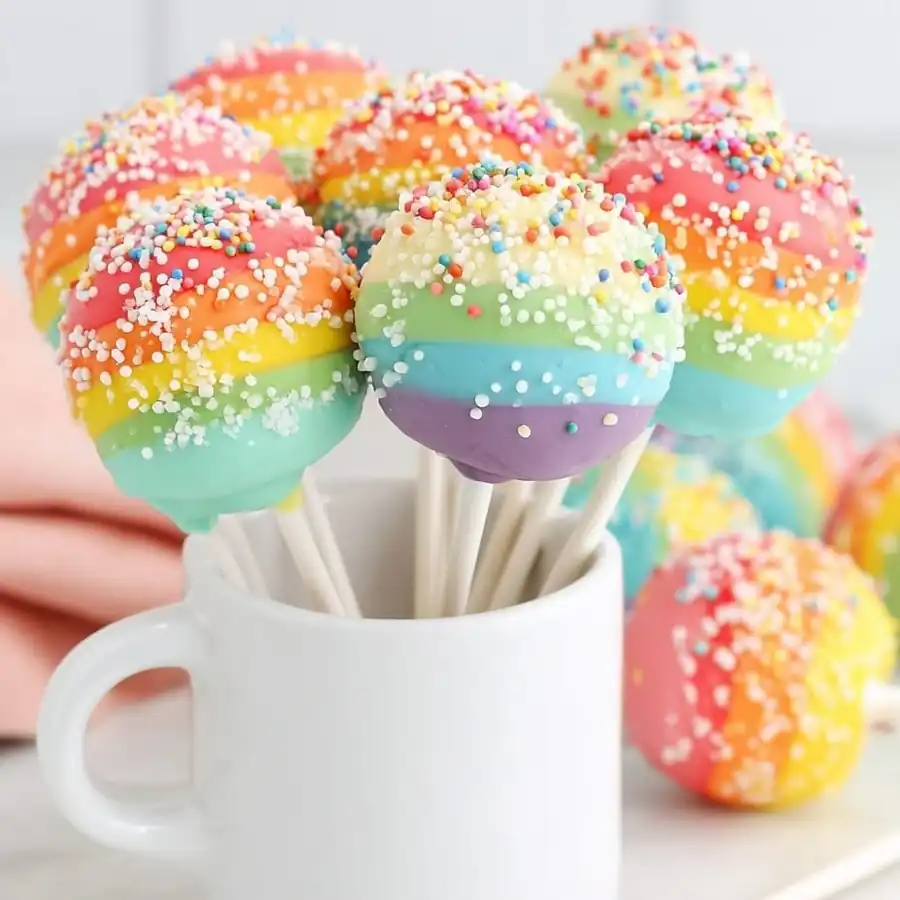
These Rainbow Cake Pops feature moist, colorful cake centers coated in a smooth and vibrant candy melt shell, perfect for parties or festive occasions. Combining a simple white cake mix with vibrant gel food coloring and finished with a variety of colored melting wafers, these cake pops are a fun and eye-catching dessert that delight both kids and adults alike.
Ingredients
- 16.25 ounce box white cake mix (plus ingredients listed on the back of the box)
- 6–8 tablespoons vanilla frosting
- Red, orange, yellow, green, blue, & purple gel food coloring
- ¼ cup white chocolate chips
- 1 cup white melting wafers
- 1 cup multi-colored melting wafers (blue, pink, orange, yellow & green; optional)
- 3 tablespoons Crisco shortening
- Sprinkles (for topping, optional)
Instructions
- Preheat your oven according to the white cake mix box instructions for cupcakes. Grease a 12-cup muffin tin with non-stick cooking spray to prevent sticking.
- In a large mixing bowl, combine all ingredients required for the cake mix using an electric hand or stand mixer until fully blended.
- Separate batter evenly into six small-medium bowls (about 2/3 cup per bowl). Add a different gel food coloring to each bowl (red, orange, yellow, green, blue, purple) and stir with a fork until colors are fully blended and vibrant, adjusting amount of gel to reach desired shade.
- Pour each colored batter into two of the 12 muffin cups, filling each about ¾ full. Discard any leftover batter from each color as needed.
- Bake according to the time specified on the cake mix box. Check doneness by inserting a toothpick; it should come out clean. Allow cupcakes to cool completely.
- Once cooled, remove cupcakes from the pan. Use a bread knife to cut off any hardened edges and discard those pieces.
- Crumble the trimmed cupcakes into six separate bowls, one for each color.
- Add about 1 tablespoon of vanilla frosting to each bowl and mix by hand until the mixture is moist and dense but not crumbly. Add frosting gradually if needed.
- Roll the cake-frosting mixtures into small balls about ½ teaspoon in size for each color.
- Take one ball of each color and flatten gently without making them paper-thin. Stack six flattened balls in the order purple, blue, green, yellow, orange, and red to form layers. Press pieces firmly together first from top to bottom, then around the sides, and roll gently into a single ball roughly slightly smaller than a golf ball. Repeat until all mixture is used, making 18-20 layered rainbow balls.
- Arrange the cake balls on a baking sheet and refrigerate for at least 4 hours or overnight to firm up.
- In a microwave-safe bowl, heat white chocolate chips at 50% power for 1 minute. Stir and continue microwaving in 30-second intervals at 50% power, stirring after each, until smooth and silky.
- Remove cake balls from the refrigerator. Carefully insert a cake pop stick about two-thirds into the center of each ball. Then, remove the stick, dip its tip into the melted white chocolate covering ¼ to ½ inch, and reinsert into the same hole. This anchors the stick securely.
- Place the cake pops back in the refrigerator to chill for 30-60 minutes to set the chocolate anchor.
- One color at a time, melt the colored melting wafers in a microwave-safe tumbler or deep glass at 50% power for 1 minute. Stir, then add ½ tablespoon Crisco shortening and continue to heat in 30-second increments at 50% power, stirring between, until silky smooth and easily coats a fork. Add more Crisco in ½ tablespoon increments if the coating is too thick.
- Dip each cake pop individually into the melted coating, allowing excess to drip off and twirling the stick gently to create an even coat. Immediately place the dipped cake pop upside down into a cake pop stand and add sprinkles while the coating is still wet. Repeat for all cake pops.
- Refrigerate the finished cake pops for another 30 minutes until the coating is fully set before serving.
- Prep Time: 2 hours
- Cook Time: 30 minutes
- Category: Dessert
- Method: Baking
- Cuisine: American