
A Taste of Golden Summer Evenings |
Picture a humid Tuesday evening in late August, where the garden is overflowing with oversized zucchini and the air smells of damp earth and anticipation. There is a specific kind of magic in transforming a humble summer squash into something that mimics the decadent, cheesy comfort of a bakery-style breadstick without the heavy carbs.
The journey to this version wasn’t easy, as early attempts resulted in soggy, limp vegetables that felt more like steamed mush than a savory snack. I almost gave up on this recipe until a sudden epiphany about salt-drying the zucchini changed everything, turning a kitchen failure into a golden-brown masterpiece.
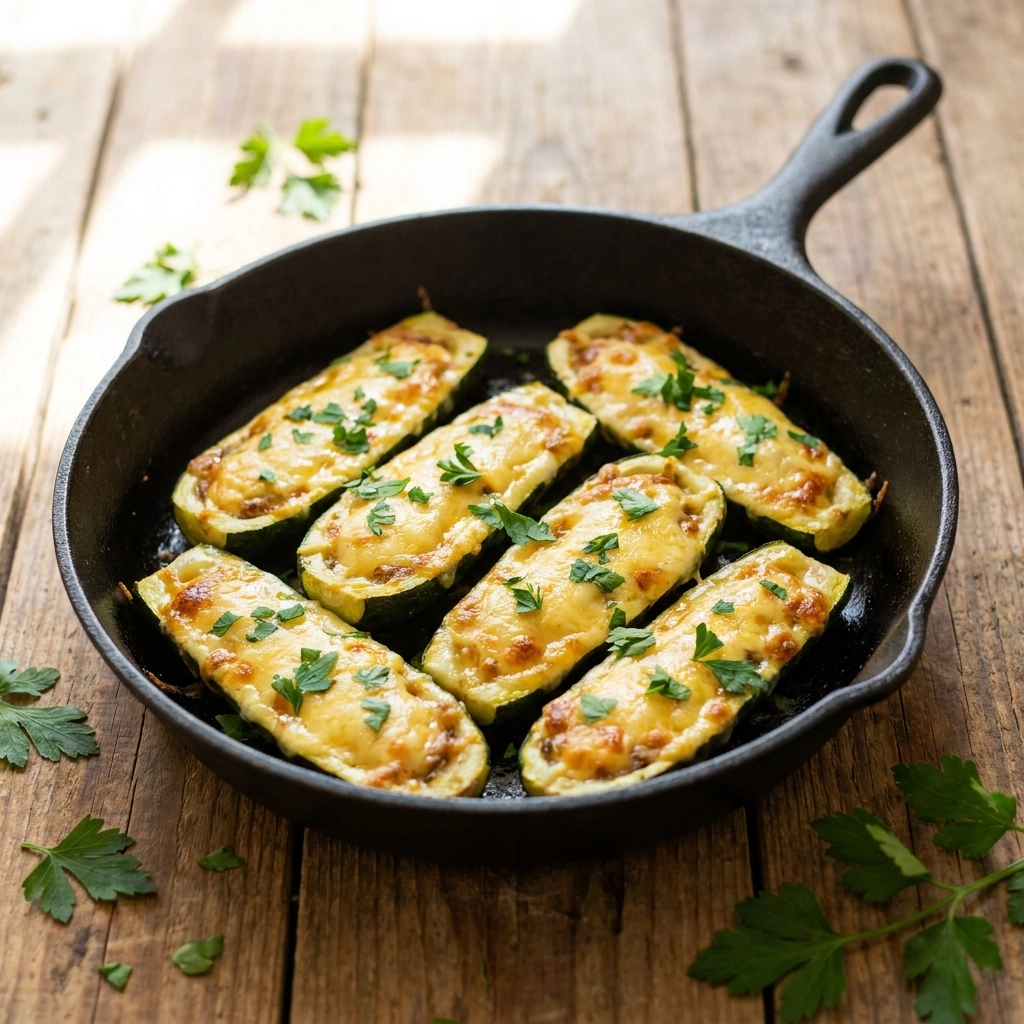
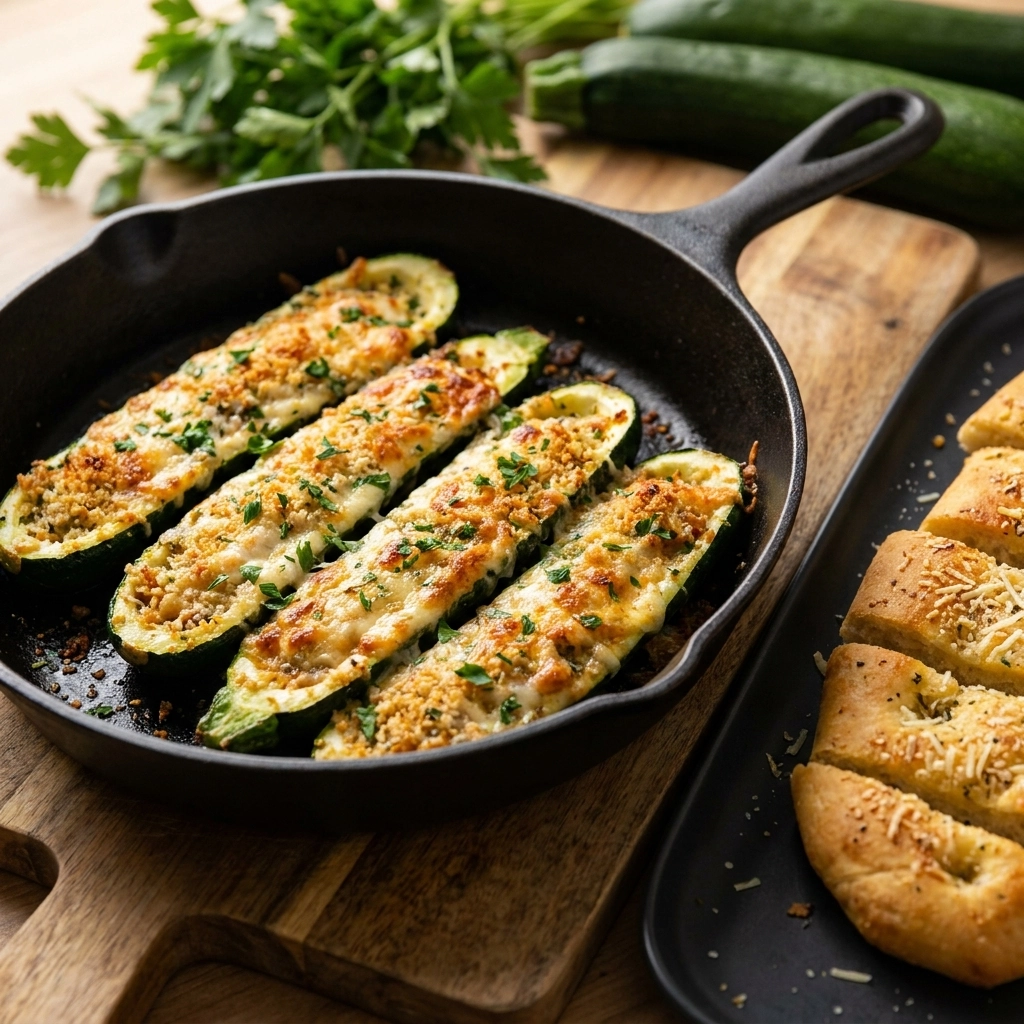
Now, these breadsticks have become the focal point of every family gathering, providing that satisfying pull of melted cheese and a hit of garlic that tricks the mind into believing it’s a cheat meal. It is the ultimate bridge between health-conscious eating and pure, unadulterated indulgence.
- ●Completely low-carb and keto-friendly, making it a safe bet for restricted diets.
- ●The texture is surprisingly firm, offering a satisfying bite that doesn’t feel like a vegetable.
- ●Rich, gooey melted cheese creates a savory crust that rivals traditional garlic bread.
- ●Takes advantage of garden-fresh zucchini, reducing food waste during peak season.
- ●Quick prep time ensures you spend more time eating and less time stressing in the kitchen.
Essential Ingredients |
Grated Zucchini: Fresh, firm zucchini is mandatory; avoid the pre-shredded kind as they hold too much water. Skipping the squeezing process here will result in a watery mess that refuses to crisp.
Mozzarella Cheese: I highly recommend using a block of low-moisture mozzarella and grating it yourself for the best melt. Using pre-shredded cheese introduces cornstarch, which prevents that signature gooey stretch.
Parmesan Cheese: Authentic Parmigiano-Reggiano adds a salty, nutty depth that creates a professional-grade crust. Omitting this removes the complex umami profile and leaves the sticks tasting flat.
Egg: Organic, pasture-raised eggs provide the necessary structural binding to hold the sticks together. Without the egg, the breadsticks will crumble the moment you try to lift them.
Garlic Powder: I prefer a high-quality granulated garlic for a consistent flavor distribution. Using fresh minced garlic can sometimes lead to burnt, bitter pockets during the high-heat baking process.
 Let’s Make it Together |
- The Prep: Grate the zucchini using a box grater, then sprinkle with salt and let it sit for ten minutes before squeezing every drop of liquid out using a clean kitchen towel.
- The Mix: In a large mixing bowl, combine the dried zucchini, grated mozzarella, parmesan, and garlic powder until the mixture is uniform.
- The Binder: Fold in the lightly beaten egg, stirring gently until a thick, moldable dough forms that no longer sticks excessively to your fingers.
- The Shaping: Scoop about two tablespoons of the mixture and roll it into a log shape roughly the size of a finger.
- The Arrangement: Place the logs on a parchment-lined baking sheet, ensuring there is at least an inch of space between each stick to allow airflow.
- The Bake: Slide the tray into the oven at 400°F (200°C) for 15 to 20 minutes, or until the edges are deeply golden and the cheese is bubbling.
Absolute perfection requires patience.
Over-mixing the dough can lead to a rubbery texture that lacks the desired crispness.
Squeezing the zucchini is the most critical step; water is the enemy of a crispy breadstick.
Using parchment paper is non-negotiable unless you enjoy scrubbing burnt cheese off your pans.
Do not crowd the pan or the sticks will steam instead of roasting.
Rotating the pan halfway through ensures that the sticks facing the back of the oven don’t burn.
Perfecting the Cooking Process |
Temperature control is where most home cooks stumble with low-carb bakes. oven at a steady 400°F, you create a rapid sear on the outside of the cheese, which locks in the moisture of the zucchini and prevents the sticks from collapsing into a puddle.
The timing is equally vital; you want to pull them out the moment the cheese turns a rich amber. If you leave them in for an extra three minutes, the cheese can separate and release oil, making the sticks greasy rather than crisp.
Add Your Touch |
For those who crave a bit of heat, stirring in a pinch of crushed red pepper flakes or a tablespoon of diced jalapeños adds a spicy kick that cuts through the richness of the cheese.
Freshness can be elevated hot sticks with melted butter and fresh parsley immediately after they exit the oven. This mimics the classic steakhouse garlic bread experience perfectly.
Storing & Reheating |
Store any leftovers in an airtight container in the refrigerator for up to four days. To prevent them from absorbing fridge odors, wrap them in a paper towel before sealing them in the container.
For long-term storage, flash-freeze the sticks on a tray for one hour before transferring them to a freezer bag for up to two months. Reheat in a toaster oven or air fryer at 350°F for 5 minutes to regain the crispiness; avoid the microwave, as it will turn the cheese rubbery and the zucchini soft.
1Use a microplane for the parmesan to ensure it incorporates seamlessly into the dough.
2Cold eggs can chill the cheese fats, so let your egg reach room temperature before mixing.
3Adding a pinch of cream of tartar to the zucchini during the salting phase helps remove moisture faster.
4Test a single stick first to ensure the oven temperature is accurate before committing the whole batch.
5Always let the sticks rest for three minutes on the tray to set their structure before moving them.
FAQ |
- ●Q: Can I use yellow squash instead of zucchini?A: Yes, yellow summer squash works beautifully as a substitute. However, yellow squash tends to be slightly more watery than green zucchini, so you must be even more aggressive with the squeezing process to avoid a soggy result.
- ●Q: How do I stop the breadsticks from breaking?A: Ensure your egg is well-beaten and fully incorporated into the cheese and vegetable mixture. The egg acts as the primary glue; if it is unevenly distributed, some sticks will be firm while others will crumble.
- ●Q: Is there a dairy-free alternative for the cheese?A: You can use high-quality vegan mozzarella, but be aware that plant-based cheeses have different melting points. You may need to increase the baking time by 5 minutes and use a slightly higher temperature to get the cheese to bubble.
- ●Q: Why are my breadsticks soft in the middle?A: This usually happens when the oven is too cool or the zucchini wasn’t dried enough. Ensure your oven is fully preheated to 400°F and that you used a kitchen towel to press out as much liquid as possible.
Irresistible Zucchini Breadsticks Recipe: Easy Cheesy Low-Carb

Savory, cheesy zucchini sticks that are low-carb and keto-friendly. A perfect healthy alternative to traditional garlic bread.
- Prep Time: 15 minutes
- Cook Time: 20 minutes
- Total Time: 35 minutes
- Yield: 12 breadsticks 1x
- Category: Appetizer
- Method: Baking
- Cuisine: American
Ingredients
- 2 cups grated zucchini (squeezed dry)
- 1 cup shredded low-moisture mozzarella
- 1/2 cup grated parmesan cheese
- 1 large egg, beaten
- 1 tsp garlic powder
- 1/2 tsp salt
- 1/4 tsp black pepper
Instructions
- Preheat oven to 400°F (200°C) and line a baking sheet with parchment paper.
- Grate zucchini, salt it, let it sit for 10 minutes, then squeeze out all liquid using a towel.
- In a bowl, combine dried zucchini, mozzarella, parmesan, garlic powder, salt, and pepper.
- Stir in the beaten egg until a dough forms.
- Shape the dough into 12 finger-sized logs and place on the baking sheet.
- Bake for 15-20 minutes until golden brown and bubbly.
- Let cool for 3 minutes before serving.